Get MatBrain™ running on your website in minutes with our simple guide below.
Script One:
<div id=”matbrain-widget”></div>
Script Two:
(function() {
var script = document.createElement(“script”);
script.src = “https://www.coba.com/tools/matbrain/matbrain-widget.js”;
script.onload = function() {
MatBrainWidget.init({
container: “#matbrain-widget”,
domain: window.location.origin,
// Path to CSV file containing SKU, URL, and Image mappings
csvPath: ‘https://www.example.xyz/media/sku-list.csv’,
// Additional configuration options
theme: “default”,
language: “en”,
debug: false
});
};
document.head.appendChild(script);
})();
</script>
Step 1: Editing the MatBrain™ SKU List template
As part of the setup for the MatBrain™, users should modify the MatBrain™ SKU List template (download below) to match which of our products they currently sell.
Download the SKU List Template
Please review the template and:
- remove any rows of products that the distributer is not selling.
- update the URL column with their page URLs for each product from the distributer website. The template currently has example links.

- update the image links to urls of images from the distributer website. The template currently has example links.

Please keep the SKUs, as this is a reference for our system to determine the results. The other columns can change.
Once the CSV template has been updated, the user then need to upload the CSV file somewhere accessible for the MatBrain™ tool. This can be a number of places including:
- The media library of the website
- A digital asset management system (DAM)
- Added to the website directory via SFTP/FTP
After the CSV has been uploaded, make a note of the url of the CSV as it is required in step two.
Step 2: adding the snippet (using CMS and Google Tag Manager)
On the top of this page, there are two code snippets that will need adding into the web page on the distributer’s website.
Both code snippets will need to be present on the same web page for the MatBrain™ embed to work.
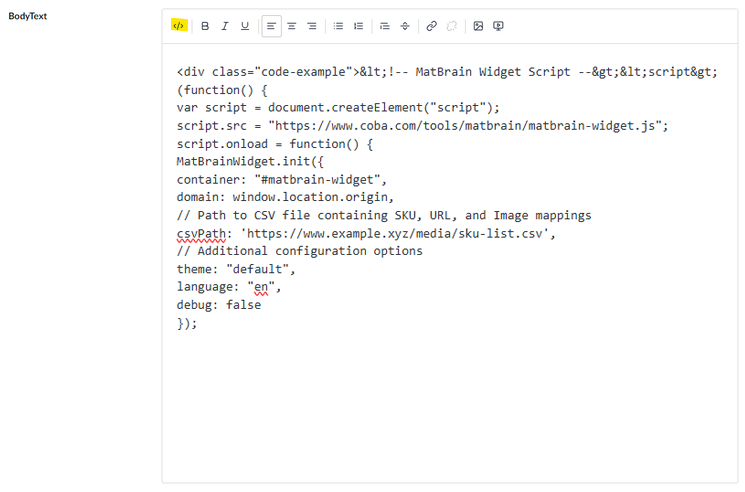
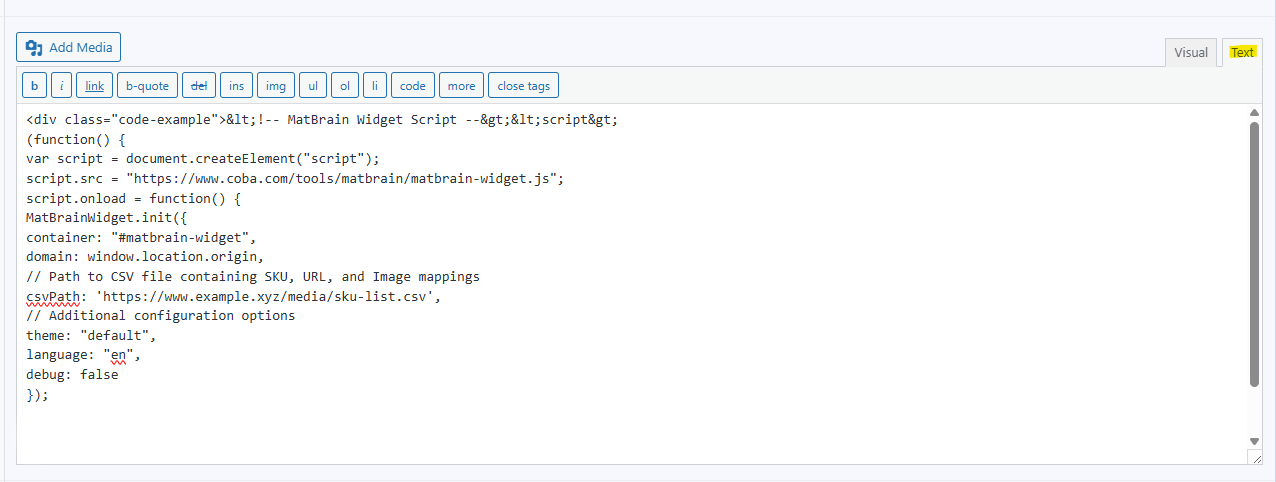
If the website allows, both codes can be added into a Rich Text Editor field or WYSIWYG field (What you see is what you get). Please add both codes to the ‘Text’ or ‘Source’ section of the field that allows editing of HTML. Examples of this can be seen below:
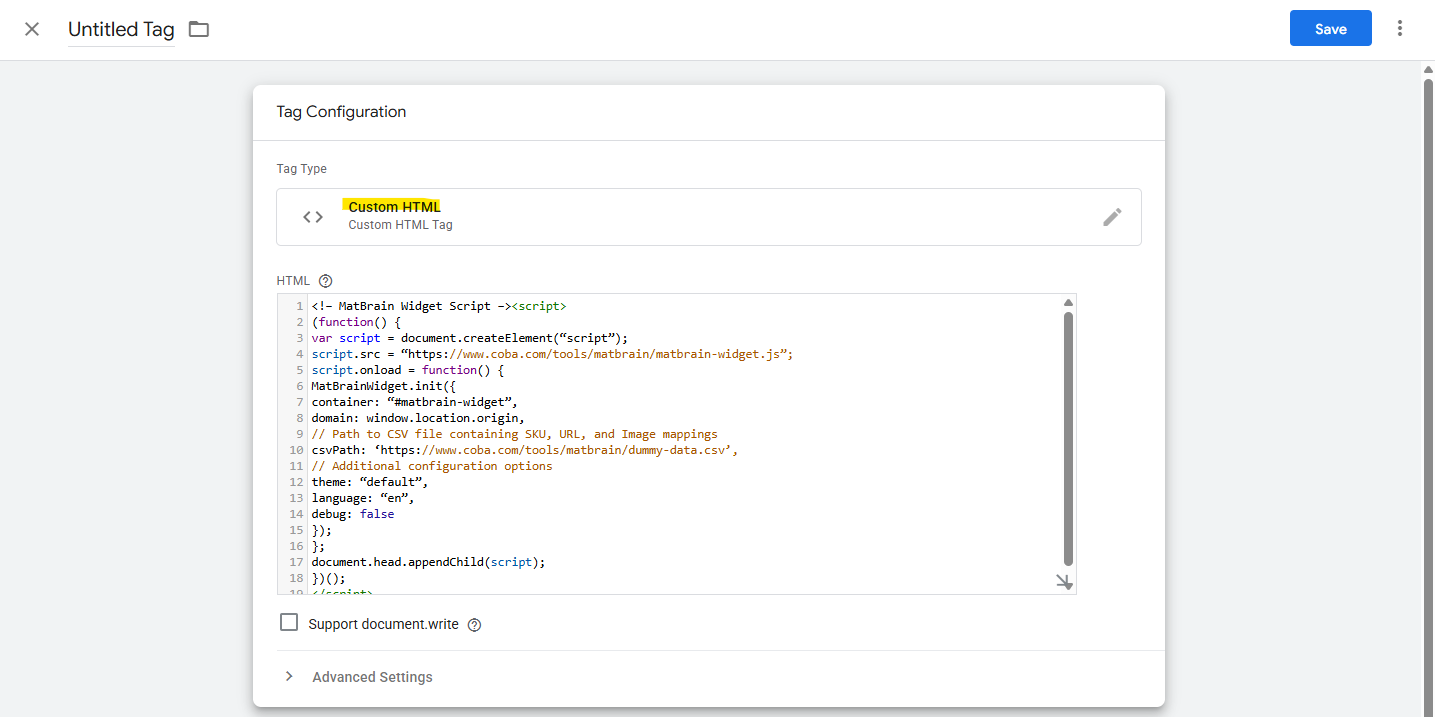
If the website will not allow <script> tags within text fields, the second script can be placed in Google Tag Manager and triggered to fire on the web page containing the first script. This will then work with the first script on the page.
You can use a custom HTML tag and copy and paste the second code snippet into a new tag. The trigger should be set up to fire on the same webpage as the first MatBrain™ code snippet. Please see the screenshot below:
Step 2: adding the snippet (front end development)
Both code snippets will need to be present on the same page in order for the MatBrain™ embed to work correctly.
The snippet can be added to a separate .js file and included in the template, or simply added to the template itself above the </body> tag.
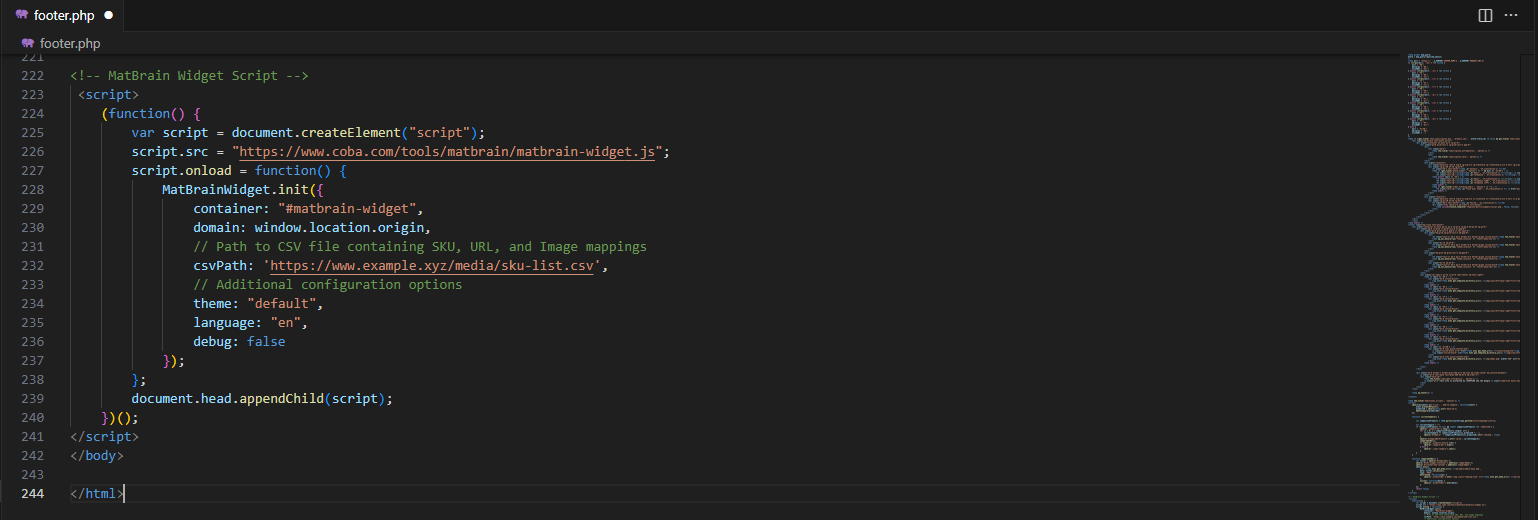
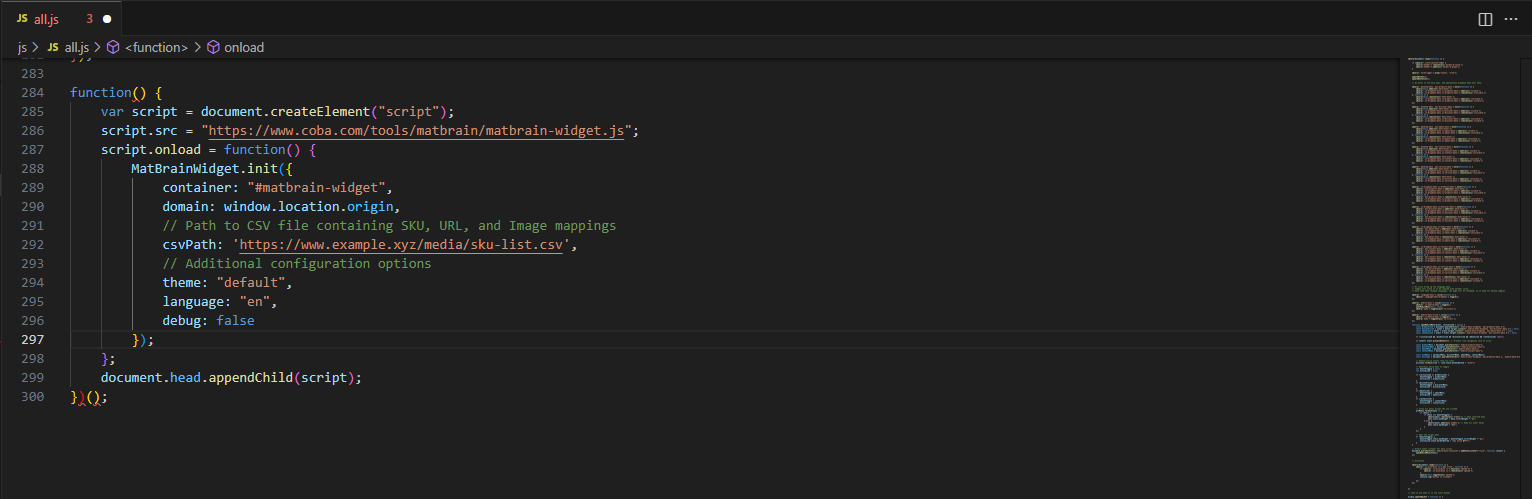
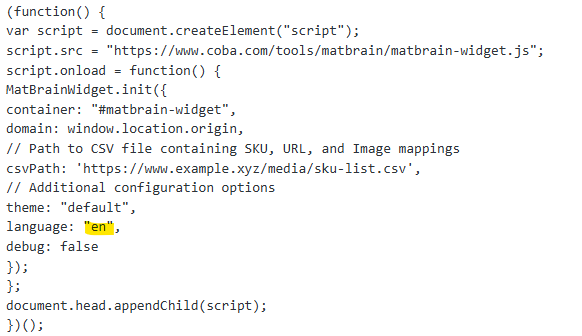
Step 3: amending the second snippet
To finalise the MatBrain™, please copy the location of the CSV from step 1 and add it to the second script. The location should replace the text “https://www.coba.com/tools/matbrain/dummy-data.csv”. Please make sure that an ‘ is added before and after the link.

Step 3: (Optional) changing the language
The MatBrain™ embed is available in several languages. If you would like to change the language, please replace the “en” with one of the following to determine which language the MatBrain™ will be displayed in.
“en” = English
“fr” = French
“es” = Spanish
“de” = German
“it” = Italian
“pl” = Polish
“sl” = Slovakian
“pt” = Portuguese